
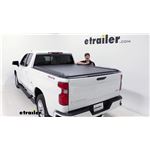
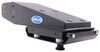
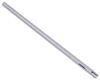
Mountain Top EVO-M Retractable Hard Tonneau Cover with T-Slot Accessory Rails - Aluminum - Black
(2 reviews)
Price: $1,929.00
Mountain Top EVO-M Retractable Hard Tonneau Cover with T-Slot Accessory Rails - Aluminum - Black
Item # MNT29FR
Our Price: $1,929.00
Will this fit?
To see if this custom-fit item will work for you please tell us what vehicle you'll use it with.


- All Info
- Reviews (2)
- Q & A (0)
- Videos (1)
- Photos
- Used (1)
Mountain Top Tonneau Covers - MNT29FR
- Retractable - Manual
- Low Profile - Top of Bed Rails
- Mountain Top
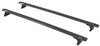
- Rack Compatible
- Aluminum
- Matte
- Opens at Tailgate
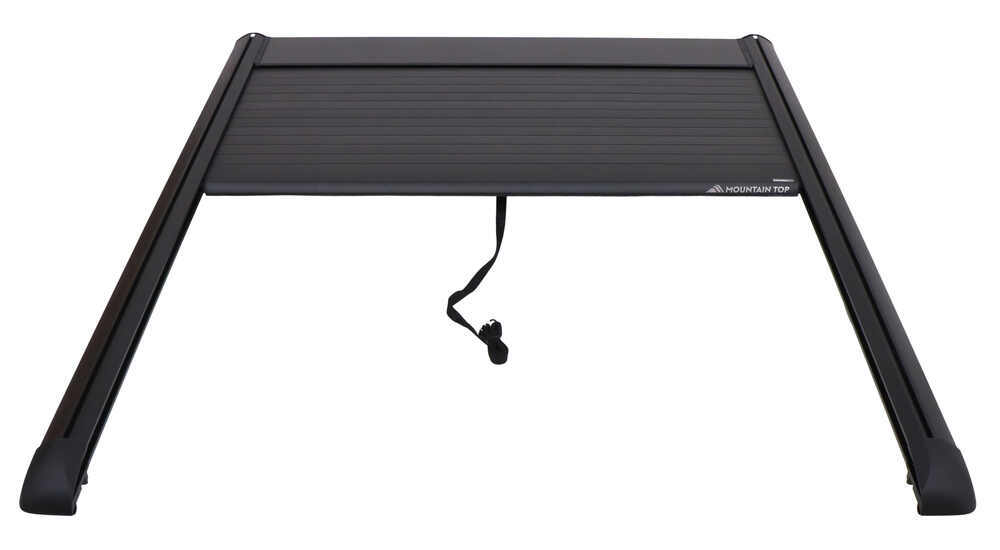
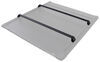
Retractable tonneau cover with T-track rails lets you add a truck bed rack for carrying additional gear. It has a 450 lb load capacity so you can use it to hold equipment or even stand on it. Impenetrable aluminum slats keep cargo safe.
Features:
- Custom-fit, retractable tonneau cover keeps the gear in your truck bed secure and dry
- Fits over most 5th-wheel trailer hitches and 30-lb propane tanks
- Reduces wind drag and improves fuel economy when closed over truck bed
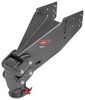
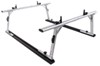
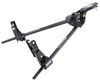
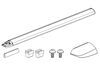
- Side rails with T-tracks let you add a truck bed rack for carrying additional gear
- Adjust rack at any point along T-tracks to haul different types of cargo
- Compatible with Mountain Top (MNT76FR), Thule, Rhino-Rack, and Yakima racks (sold separately)
- Integrated pull strap lets you deploy cover quickly
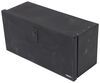
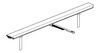
- Space-saving canister stores retracted cover and shields it from the elements
- Spiral track system keeps cover from rubbing against itself, preventing wear and tear
- Angled bottom takes up less space in your bed, leaving more room for cargo
- Water management drain system handles up to 10 gallons per minute
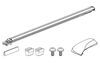
- 2 Large rubber drain tubes let out any water that gets inside canister
- Foam seals install under rails and canister at bulkhead
- Cover overlaps top of tailgate to prevent water from leaking inside
- Latch-free closure deters theft - when tailgate is locked your gear is secure
- Patented knife-proof slat system is impenetrable
- Black powder coated aluminum slats are dent and corrosion resistant
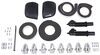
- Easy installation - some drilling required
Specs:
- Canister dimension: 8-1/4" tall x 9-15/16" deep
- Height above truck bed side rails: 2"
- Weight capacity: 450 lbs
- 3-Year limited warranty
EVOmCH16FB01 Mountain Top Retractable Truck Bed Cover - Aluminum - Black
Installation Details
This Product Fits The Following Vehicles
- 2014 - 2024 GMC Sierra 1500 6-1/2 Foot Bed
- 2019 - 2022 GMC Sierra 1500 Limited 6-1/2 Foot Bed
- 2014 - 2019 GMC Sierra 2500 6-1/2 Foot Bed
- 2014 - 2019 GMC Sierra 3500 6-1/2 Foot Bed
- 2014 - 2024 Chevrolet Silverado 1500 6-1/2 Foot Bed
- 2019 - 2019 Chevrolet Silverado 1500 LD 6-1/2 Foot Bed
- 2022 - 2022 Chevrolet Silverado 1500 LTD 6-1/2 Foot Bed
- 2014 - 2019 Chevrolet Silverado 2500 6-1/2 Foot Bed
- 2014 - 2019 Chevrolet Silverado 3500 6-1/2 Foot Bed


Video of Mountain Top EVO-M Retractable Hard Tonneau Cover with T-Slot Accessory Rails - Aluminum - Black


Videos are provided as a guide only. Refer to manufacturer installation instructions and specs for complete information.

Video Transcript for Mountain Top EVO-M Retractable Hard Tonneau Cover Installation - 2020 Chevrolet Silverado 1500 MNT29
Hi everyone, Aiden here with etrailer. Today, we're gonna be taking a look at, and showing you how to install this Mountain Top EVOm retractable hard tonneau cover on a 2020 Chevrolet Silverado 1500. Any tonneau cover is gonna offer a couple of different benefits, it's gonna protect all the stuff underneath from the elements a bit, not all tonneau covers are perfect, you might still get some water intrusion, but it's gonna help quite a bit, and I think this one does a great job at it. When it's closed, it'll help our fuel economy by reducing drag, and more important than anything, I think it offers security, what is out of sight is also out of mind, so all of your stuff inside the bed is going to be much safer underneath the tonneau cover, and especially a hardcover, because the soft ones are very easy to just cut through with a knife, whereas this one is constructed of a series of aluminum slats that are interlinked together, so you can't even cut through the seams, everything underneath when paired in conjunction with your locking tailgate is going to be locked up and safe. And one of the things that makes this Mountain Top tonneau cover unique is the t-slot accessory rails that run the length of the bed, so you can mount up crossbars here, and pair other accessories with this. Now, Mountain Top's not the only company that does this, both Retrax and Pace Edwards have options that are very similar to this, and we'll talk about, and compare the options a little bit more going forward, but if you don't have any need for the t-track, then I'd say you can just go with a regular retractable cover, and you don't need to pay for this feature, but personally I think this adds a lot of function, and if you're looking for it, Mountain Top does a great job at integrating it.
And like I mentioned at the start, this is a retractable cover, and what that means is the hole cover, when I pull one of these red release levers, whenever I pull that, it'll just retract into a canister at the front of the bed, so you're not really left with anything additional sticking up from the bedrails, aside from what sticks up to begin with, and all of it rolls up inside that canister. Now, the canister style isn't for everyone, it does take up a little bit of bed-space, so if you want to maximize your bed-space, you might look for a tri-fold, or one of the rolling ones that rolls on top of the bedrails, but personally I like this because I think it's quite clean, and it looks good too. Now, comparing this though, both Retrax and Pace Edwards make retractable covers, I think that each one brings different benefits to the table, personally I think Mountain Top is a much more solid install, everything on here is rock-solid and very secured, whereas with something like Retrax or Pace Edwards, I think they might be a little bit smoother to operate, I think Pace Edwards is the smoothest of the three, this one's kind of in the middle, and Retrax I think does a better job at making it easy to close, I like this a lot because we have our pull-strap looped through one of those releases, so I can close it from the tailgate very easily, but if I had the tailgate closed, I wouldn't be able to do that, because there's nothing for me to grab onto, Retrax has a lever on the top that you can grab onto, and it locks up, so whether your tailgate is open or closed, you can always operate it, that might not be a big deal for some people, but it's something that you just might not think about it, until you run across that issue, and if you don't wanna open the tailgate, then it's just an extra step you have to go through. The Mountain Top cover is a little bit more bulky in the sense that it sticks up further from the bedrails, from the bedrail to the tallest point, it's about 2in, which compared to some other options out there, is a lot more, so if you're looking for something that's gonna be very low profile and sleek, there's better options out there, like the Pace Edwards or the Retrax, personally though, I think even though it is bigger, it doesn't look bad, everything contours and fits the truck bed very well, and you can tell the construction is high quality. One of the other things I like about it is even though these side-rails are wider, it gets a lot more contact on the bedrail itself, which means it's a lot more stable, you can support 450lbs on here, evenly distributed, it's definitely important to know if you do mount up some crossbars in the t-track here, maybe mount a tent, or a basket on top, that is going to be your dynamic weight capacity, when you're holding still, it does increase, but for moving, that's gonna be what it can handle.
To access that t-track, you want the tonneau cover to be open, so no one can do it, unless you have the tailgate open, push in on a small tab to pop it out, that's where the tab is located, kinda hard to see on camera, but you can definitely feel it, that'll expose the track underneath to mount up your accessories, and then, just pop it back in place whenever you're done, and that button will click back in, and be fully secured. Mountain Top cover has a ton of different weather sealing all around, I think it's gonna be one of the better options if you're looking for protection against rain, because there's foam seal along the whole side-rail on either end, it's gonna be going along the bulkhead, and it's got a very nice rubber seal on the end of the cover for when it's closed, and the tailgate is shut, it makes great contact, and I couldn't find any gaps where air or water might get in, so I think it's gonna offer good protection, but any water that does land on top and maybe get into the canister here, you've got drain tubes that we install later in the install process, that run outside the truck bed, they're very wide drain tubes too, so they can handle a lot of water coming in at once, and they're rubber, so I think they're gonna hold up really well to the test of time, and that larger size is gonna be able to move more water out, so even if it's a heavy rain, I don't think they'll get backed up. Most tonneau covers are gonna have your side-rails just clamp directly to the bedrails of your truck, and looking at this one, you might think that's exactly what it does, but this one's a little bit different with the install process, they've got secondary brackets that you clamp to the bedrails, and then the tonneau cover actually sits on top of that, and bolts that secondary bracket, it's one of the things that gives it more surface area contact on top, and makes it so sturdy, even on the inner edge here, so if you've got weight coming down on it, you're not gonna notice really any flex at all, it's one of the things that adds a lot to the install process in terms of time, and just adding extra parts. Speaking of that installation process, that's really all there is left to this, we'll walk you through the whole process, like I mentioned, it is a little bit more involved, just because there is some drilling required, and there's a few steps on here that most tonneau covers just don't go through, I think the end result is worth it, but if you're not too keen on the extra install-steps, you can always check out one of the alternatives that we mentioned, but if you're sold on this, and you think it's gonna be the right thing for you and your truck, follow along, and we'll show you how we got it installed. Starting off the install, there's a couple things you wanna do as far as prep-work goes.
We cleaned off the bedrails, and the bulkhead on the truck, we un-packaged everything, and took off some of the protective plastic on the canister, and opened up all of our bags of hardware, to make sure we had everything, and nothing was missing, it's just gonna help you stay a little bit more organized, especially if you go, and you find all the tools you need, the instructions are pretty helpful, and do layout all the tools you need throughout the install process, so page through those, find what you need, get everything on-hand, and it'll just be helpful to be organized. As far as the first step that we're gonna do, we're gonna take our side-rails here, identify which one is the passenger and driver's side, and install the weather-seal on the underside. So, these are pretty easy to tell which one's which, there's gonna be a curved end, that'll be towards the outside of the truck, so for us today, this is going to be the passenger side. And the other thing to look for is this piece here, the exposed bit with the curved end, that's going to be towards the tailgate end. So, I'm gonna put this upside down, and our weather-seal is going to install on the outer track, towards the outer most edge of the truck bed, and in your kit, you're gonna get multiple foam seals, but the two that are identical in size, are gonna be the ones that are for the side-rails, and it's also pretty easy to tell in terms of the thickness, just make sure that the side lines up, and we can start at the cab-side of the rail, and work our way down, and as we're doing this, just take it nice and slow, it can help to maybe have an extra set of hands to hold this for you, since it is a bit curved on the topside there, but it's not necessary, and just work your way down towards the end.
At the end here where it curves, just take the weather-seal all the way out past that, and trim a little bit generously, leaving some overhang, we'll flip this around topside and clean that up, you can do this with a utility knife, or scissors, whatever works best for you to just clean this edge up. Now, on the top side, there's going to be a few of these pieces, these plastic pieces that sit inside a series of tracks, they're kinda hard to find, and depending on how things have moved around in shipping, they might be kinda recessed back here, so you might have to just kinda feel back there, and pull them out to the front, basically we just wanna pull these out to the front a little bit, we're gonna flip this upside down again and go to the other side. And on the other side, we can see the other ends of those track pieces, and along those track pieces, there's going to be these little cutouts, and reliefs, we basically just wanna make sure that all of them are either flush with the relief, or leave some extra room. Now, we've got a couple of our extra side brackets that we've pulled out of the packaging, just lay that on the ground for now, we wanna turn our attention to the largest one, that's going to be more of a center bracket, and this yellow piece here is actually a tool that we use in the installation, so just lift that off, it's located on the underside of that piece, with the pull-cord and everything attached, it's a little hard to find, but that's where it's located, and we'll use this for the next step. With our canister set out on the ground, we can take that yellow tool, find this weather-strip located on the top, and if we peel it back a little bit near the center here, there's a plastic bar that we can feed this through, and pry up the middle top open on both sides, there is one piece of packaging material located in there that we can toss out, then we can turn our attention back to the side-rails. On the underside of our side-rails, we're gonna need these block pieces that have sort of a t-shape in them, with a threaded hole in the center, there's four of these in your kit, and then these two rubber pads here, those will go on the underside of our side-rails, so if we turn our attention to the back, here's our foam seal we installed earlier, and on the cab-side, we're going to be putting this piece on right here, it kinda just pinches around that plate, it's a little hard to get it in place, but if you can open it up, that's easier to feed it around. Once that's in, we can take those blocks, and feed them on this t-shaped track directly above that, no exact positioning for these, but they'll be spaced apart, about like that, then those will be our attachment points for the canister, and you can finish by peeling this backing off of the foam-shield. Now, on the other side, you'll notice that we've got our side-rail supported by a box, an extra set of hands can do the same thing, but the box helped us a lot for installing this with one person, and you can see there's those two blocks we installed earlier, and here's two holes on the canister of the tonneau cover that those will line up with. So, it's probably gonna be a little hard to see once I lift this up into place, but we can get those lined up as best we can, flip it over, and see this edge here That'll sit flush right behind this edge here, so that'll rotate in, and on the underside, we're gonna have two screws, T30-bit that came in our kit, same place as those blocks we located, just feed those in, and thread them in. Once the T30 torque screws are tightened down fully, we can take these pieces that we slid in earlier, and slide them in as much as we can. Now, this one might have some resistance to it, but we should be able to get it to sit flush right there, and now, this one on the bottom, this track piece will hit a stopping point, we're gonna actually go back up to the canister, and finish this up. And here's where that piece is, there's a small notch in it right there, where you can use that yellow tool to kinda feed it in, and get it to slide underneath that plate there, and hear a click. I'll try to keep my hands out of the way as best I can, once it's in, just keep pushing it forward, and hopefully you can kinda see that piece right there, I got it to click in off-camera, and if you're having trouble with it, once it gets under that lip initially, you can push from the end, and that should get it to move, but we just want that to bend underneath this plastic plate and click in. And once both sides are done, close up your canister, making sure that it clicks on both sides, and latches shut. Underneath the canister, there's going to be this long strip back here where we need to add more foam-seal, we want it to go all the way to the edges where it will meet our side-rail sealing on either end, so it's a little difficult to do on the ground here, but I'll try to stay out of the way, and show you as best I can, take it slow, and go end-to-end, trimming off the excess on the other side. Once that's installed, you can take the paper backing off of it, and at this point, the instructions want you to pre-install the drain tubes onto the canister here and zip-tie them in place, it's gonna be a little hard to do that on the ground, so I'm actually gonna wait on that step until we get this up into the truck bed, I'll let you know when we get there, and we'll show you how we did it, but if you wanna do it at this point you can, I'd recommend just finding some way to elevate the entire canister, and support the side-rails. In our truck bed, we're gonna turn our attention to one of our brackets, if it comes with two that look pretty similar, those are brackets for the side, and this one that I'm holding is going to be a bit different, that's gonna be for the bulkhead of the truck, it's gonna be at a right-angle, and on one side, there's going to be a series of holes, five in total that run the whole length, that's the part that we want in facing towards the tailgate, I'll bring this up to the bulkhead and we can start marking some drill locations. So, I'm gonna set this down in place, it's gonna be sized pretty much perfectly, but with a little bit of wiggle-room side-to-side, do your best to get that centered up, it doesn't have to be exact, I'm gonna get it as close as I can, it's one of those things where it sits so close to the bedrail of the truck here, that it's almost harder to get a tape measure in, and it's almost easier to eyeball it, or maybe just find a pencil, or something somewhat thin that you can use to mark that out, and check for the spacing on either side, once you're happy with how it's spaced apart though, I'm going to use a paint pen to actually mark out these five holes as our drill locations. Now, that just fell out, so you can be a little bit more careful about it, depending on if you've got a bare metal bed, you might find it easier to just use a punch, but because we have the spray-in liner, that's going to make it hard to see, which is why I opted for the white paint pen. Now, when you're doing this, you'll notice on either end there's notch holes, ignore those for now. With our bracket removed and those markings left behind, we're gonna just drill those holes out, using a 330 seconds drill-bit. (drill drilling) With everything drilled-out, I went back through and added a little bit of paint around those drilled holes, so that there's no bare exposed metal, and underneath that bracket, I'm going to take our last bit of foam-sealant, and actually attach it onto this ridge here. As we're doing this, you wanna leave a little bit of overhang on either side, get my hand out of the way there, that way, we just have a bit of overhang, about a in is what we're shooting for, those go down through, like we have with all the rest, peel the backing off, and put it in place, and screw it in when I'm done. Once this is all off, just go back through and make sure everything's stuck down properly, and we can flip it over, and get those holes lined back up, and use the T20 screws that come in your kit, to reinstall it. So, let's get this lined up, you'll have to apply some downward pressure to get those holes lined up, since we did add that foam, and just run these all down. (drill drilling) Now, the next holes we need to drill are our drain-tube holes, those notched cutouts that I mentioned earlier that I said to not worry about, now is the time where we're gonna look at them, they're located on the outer edges, right by the outer holes we just used to mount up this bracket, that's basically going to be the thing we use to line up our holes side-to-side, and down here is where I've drilled out the pilot hole for that drain tube. Basically, what you wanna do is go from the top of the bracket, measure 10in down, and that's where our pilot hole's gonna be, and we want it to be in-line with that notched cutout, don't take your measurement from the notched cutout, just use that to determine our side-to-side location. So, right about here is where ours was, I found it helpful to lock the tape measure in place, so it kinda sat there, and use a paint pen right there to mark the hole. We've already drilled-out the pilot hole, we're just gonna come back through with our 1in hole saw to drill out the final size for that drain tube. (hole saw cutting) Then, just like before, we're gonna go back through with some clear primer, or a paint pen, and cover up all the bare metal to prevent any rust from creeping in around that freshly drilled hole. Next up is gonna be the side-support bracket, this is gonna be the thing that our tonneau cover sits on and bolts into, and this will be clamped to our bedrail, you can tell which side is which, by looking at the very back end where there's a large plate labeled 'R' or 'L', 'R' for passenger side, 'L' for driver's side, and we want it to be sitting with those bottom holes faced up, because it'll be just clamped to the inside of the bedrail right here. Now, to get those clamps assembled is pretty straightforward, this is what the finished product looks like, you're gonna have four for each side. To get this assembled, the two pieces of the clamp will slot into each other like that, and then, we'll have a cylinder block with a square slotted side, and a circle-side, that square slot inside. Side, excuse me. We want to be facing away, but that'll go in this other back slot here, I'll set that back to it's side for now, our bolt with a flat washer will pass through the other side of the clamp, through the whole assembly, out the other side, and we'll add a locknut onto that, and it'll sit between the square edges of that cylinder, only lightly thread this in place, because we want this clamp to be able to open up enough. Now, we want that bracket to sit on the inside of the bed rail, flush with the top, and you'll notice that I've got some painter's tape, that's marking out an inch of a gap between the inside of the tailgate there, to the start of the bracket, so I'm gonna get that lined up, and get my first clamp installed. Now, there's gonna be four locations marked on your bracket, and you can find those by looking for these small notches, there's gonna be two of them right next to each other, and the clamp will sit just between those, and the lip will sit in that gap right there on the clamp, so I'll get it installed, so you can see that a little better, get that in, start to tighten it up by hand, and we can go back through with our 5mm allen, and tighten it up, and as we're doing that, just making sure that everything stays level with the top of the bedrail, and with that tape mark, if I didn't mention it already, you will absolutely want a second set of hands here to help support this, while you get the first and the last clamps in, so we have the tailgate side in first, we'll get the side closest to the cab, and do the two middle ones last, once it's supporting itself. With some extra sets of hands, lift the whole assembly, and get it into the truck bed. Now, we've kinda got a limited space here in our garage, so one person at each corner is helpful, 'cause the rails are quite heavy, and as we lift this in, be careful to watch your fingers, we're not gonna put it all the way towards the bulkhead just yet, right about here is gonna be good, so we can install our drain-tubes, and then we'll get it moved the rest of the way in. Before we get it all the way in place, we opted to hold off on the drain-tube installation until now, 'cause it's just easier for you guys to see it this way, but we want this to be facing towards the back, try to keep my hands out of the way as best I can, and on the other end here, we actually did trim it up to the second notch, just with a pair of scissors, we did this by holding it up to the hole we drilled out earlier, and just kinda eyeballing what mark would be good, so that it wasn't pressed up against the cab of our truck. Once we've got that trimmed up, we can slide it on to the underside of the canister here on either end, as you're doing that, just make sure you stretch it over, so that's got a nice strong hold, and use the provided zip-ties to cinch it down. With those in place, we can fully set this in now, gonna feed the back end by the tailgate down first, and then, once that's in place, we can drop the canister in, and scoot it forward if need be. Before we bolt the cover to those brackets, we do wanna check one measurement, and a couple other clearances, just to make sure things are lining up okay. Go up to the canister, and measure from the end of the side-rail to the end of your bedrail on both sides, and just make sure it's even side-to-side, and then you can also make sure that things are looking like they're about parallel to the back window on your cab, but we can actually go to the end of the side-rail and check one more thing. So, this track right here on the end of the side-rail, and this bracket, this part that juts out that said 'R' or 'L' on it, we basically want these pieces to be touching, so there's a seal in place that kind of makes you have to push down, but push down, pull it forward until the two touch, and that'll ensure that things are relatively even with the tailgate end. This part's gonna probably be hard to see, but I've got a screwdriver in, holding one of these threaded blocks, it's in a track on the underside of your side-rail, when we we're doing all of our pre-assembling, you probably saw it earlier, but we're gonna get these lined up with the slotted holes, in the bracket that's clamped onto our side-rail, so I've found that a screwdriver was the best thing to use, to line these up for all four locations, and then, they can get them bolted in. Once all those blocks are lined up with the slotted holes, take your 10mm bolts with the flat-washer, feed them up through, and into those blocks. Now, you might have to put some significant downward pressure on the ends of those rails to get it to reach, 'cause they're not super long bolts, but that can easily be done with an extra set of hands if need be, and we're just doing this loosely for now, no tightening down just yet. With all eight bolts, four on each side loosely started, we need a few more measurements to make sure that the rails are running parallel to each other. We can start by taking one measurement at the canister, and I'm gonna utilize the t-track up on top of those rails as an anchor-point for the tape measure, measure from side-to-side, and then, take that same measurement, but at the end of the side-rails, we want those two measurements to be equal, and if they're not, we can just push out on the side-rails a little bit, maybe have a friend hold them in place, and then fully tighten down these rear bolts to keep the ends of the rails still. Once that's where we like it, we can take an additional measurement, going from one corner to the opposite corner diagonally, again, just repeating that measurement on both sides, and once those measurements are even, we can tighten down the other three clamps, or the other three bolts on each side. With everything tightened down and measured out to make sure things are running parallel, we're ready to complete our final steps. Now, we need to get the cover pulled out, I think it's easier to lift that top cover up, so you can find the end of the cover, and start pulling it along the track, and to the end. Now, if it doesn't pull smoothly, chances are your measurements we're maybe off, but ours if moving really well right now, just take it slow though, 'cause we're gonna pull it all the way to the end, right about here, and take the end piece, where we got that yellow tool from in the very beginning, and on the back side, there's going to be a track that will line up with the end of our cover, this is gonna basically be the release latch mechanism under here where we can pull this to release it, but first we need to get it attached, it might be easier with an extra set of hands, I'm gonna try to do it on my own. We're just gonna join these two pieces together, and slowly slide it in, so definitely doable on your own, but would be easier with an extra set of hands. So, get that slid in towards the middle, even on side-to-side, and start sliding it back in. It'll get to a certain point where you might have to pull that release mechanism to get it to slide back in, and right there it latches, and closes, pull the mechanism, it slides back in, all the way, it latches in there, we can close the top of the canister on both sides, make sure it clicks back in, and that's looking pretty good. Now, we gotta make sure we don't forget about these drain-tubes, there's gonna be a gasket around the edge there that should seat pretty well in that hole that we drilled out to make sure that this doesn't come loose. So, on both sides, just pop that in, we already did all the necessary trimming to make sure that it's a good fit on the other side of the bulkhead there, so we just gotta pop it through, and make sure it seats properly on both sides. Our end-caps will just snap in with this small button tab type thing on the side, lining up right here, it's gonna be a little hard to see on camera, but you can definitely hear that click, and it's nice, and secure whenever you get it in. And as for the pull-cord, I actually looped it through one of the red release handles underneath, so when I pull it now, I can just pull it all from the tailgate and deploy the cover, into the locked position, I can of course install the other end-cap there, just to make sure all this is covered up, and once that's done, we can clip the snap-ring right here onto one of our tie-down points on the inside of the bed, just so it's ready to go for next time, and we can test for the final fitment of the tailgate by closing it up. Everything sits really nicely with the weather-strip at the end, the tailgate closes properly, it opens back up when we need it to, and, this will open up whenever we want it to as well. Now, it doesn't slide back all the way on it's own, but it is smooth. One thing you might find is that a little bit of wax on the inside of the rail here would help, over time as you use it, it's probably gonna break in a little bit too, we recommend leaving it closed for 24hrs after you get it out of the packaging and first install it, that tends to help a bit too, but over time, if you need to apply a little bit of wax or lubricant right inside here, that may be a helpful tip. But aside from that, the install is done, it is definitely a little bit more involved, but I think the finished product is a really solid tonneau cover, that's gonna offer maximum security on your 2020 Chevrolet Silverado 1500.
Customer Reviews
Mountain Top EVO-M Retractable Hard Tonneau Cover with T-Slot Accessory Rails - Aluminum - Black - MNT29FR
Average Customer Rating: 2.5 out of 5 stars (2 Customer Reviews)
Retractable tonneau cover with T-track rails lets you add a truck bed rack for carrying additional gear. It has a 450 lb load capacity so you can use it to hold equipment or even stand on it. Impenetrable aluminum slats keep cargo safe.by: Jerry C11/04/2023
Once assembled it’s a nice unit, BUT
1. Very complicated, awkward assembly process. One person can not adequately do this by themselves. It took my son 4-1/2 hours to follow the instructions and it was a complicated intricate process. MountainTop Engineers should be tasked with improv wing assembly
2. WORST ASSEMBLY INSTRUCTIONS EVER! Pictures only and how ridiculous they were because it took two of us Tony to interpret what was being communicated. Whoever developed these instructions should be reprimanded and educated that written instructions are a must for this complicated of assembly. It seemed like 1/2 of the four + hours were spent on the word Huh? And trying to assess exactly what was being communicated. Pictures only doesn’t cut it. We weren’t putting batteries into a flashlight. Ridiculous instructions
by: James01/23/2024
2
2
See what our Experts say about this Mountain Top Tonneau Covers
- Will the Mountain Top EVO-M Work w/ a Yakima Tonneau Cover Adapter on a 2021 Chevy Silverado 1500?Yes, to both of your questions! The Mountain Top EVO-M Retractable Hard Tonneau Cover with T-Slot Accessory Rails - Aluminum item # MNT29FR is confirmed to fit the 2021 Chevy Silverado 1500's with a 6-1/2' bed. It is also compatible with the tonneau cover adapter that is included with the Yakima OverHaul HD Adjustable Truck Bed Ladder Rack item # Y01151-5955 you referenced.
view full answer...
Used Items Available


Condition: Badly Dinged
Notes: Unit has multiple dents and scoffs around the cover and rails, also some rails slightly bent.
Info for this part was:

Video by:
Chris R

Video by:
Charles A

Written by:
Matthew S

Edited by:
Daron K

Installed by:
Adam E

Updated by:
Noah M

Updated by:
Carrie F

Test Fit:
Aidan B

Video Edited:
John S
At etrailer.com we provide the best information available about the products we sell. We take the quality of our information seriously so that you can get the right part the first time. Let us know if anything is missing or if you have any questions.
Product Experts Available Now!
Call 1-800-940-8924
Thank you! Your comment has been submitted successfully. You should be able to view your question/comment here within a few days.
Error submitting comment. Please try again momentarily.